I am attempting to maintain a blog filled with random bits from my life and family as well as my adventures in crafting.

Showing posts with label Designer's Calendar. Show all posts

Friday, December 29, 2017

Cut It Up - Calendars

Happy Friday!!!

Did everyone survive Christmas week?!?!
It was a whirlwind, that's for sure.

Cut It Up

Today over at Cut It Up
our new challenge is all about Calendars...

No automatic alt text available.

Our Sponsor:
Heartfelt Creations
$20 Gift Certificate

My Project:
For this challenge I decided to use
Designer's Calendar to make a simple, yet effective
calendar for January.

I really like all the options this cartridge has
to customize a calendar specific to your life.

My background paper is from The Paper Studio
my other cardstock is from Recollections.

I hope you are able to share your different calendar ideas
with us over at Cut It Up!

Thanks for checkin' in!!!


Monday, July 3, 2017

BBTB2 - July 4th

Happy Monday!!!

Welcome to another challenge over at BBTB2!
This week was my choice for the challenge and seeing
as how the 4th of July is tomorrow
I though we could channel our inner
Red, White & Blue.

I used the cut from Designer's Calendar for July 4th - LOVE.
I pulled some papers from my stash and just kind of
criss-crossed them for this fun layout.

I love the 4th of July and all that it stands for...
I also love the fireworks ;)

Thanks for checkin' in!!!

Friday, March 10, 2017

Cut It Up - Think Green

Happy Friday!!!

Welcome to another challenge over at Cut It Up!
Cut It Up
Challenge:
No automatic alt text available.
Think Green!
Use 3 different shades of green
on your project!

Sponsor:
Heartfelt Creations
$20 Gift Certificate

My Project:
For my project, I decided to go festive :)
St. Patty's Day is coming up, right?!?!

My shamrock is from Designer's Calendar.
All my papers are from my scrap stash.
The enamel dots are Recollections,
and the sentiment is from Fiskars.

I hope you will join us over at
Cut It Up!

Thanks for checkin' in!!!

Monday, March 21, 2016

BBTB2 - Spring Fling and Easter Things

Happy Monday!

What a day!
My husband got the all clear from the Cancer Clinic today!!!
He had a Bone Marrow Biopsy a couple of weeks
ago with the fear of a relapse,
we got the results today and he is still in Remission!
Happy Day :)

Anyway, over at BBTB2 another challenge has started
all about Spring and Easter.

How awesome is this egg cut from Designer's Calendar?!?!
I think it is fabulous :)
Every year I am the one to host the Egg Coloring Event
with my nephews, nieces; of course my kids are there too.

It is one of my most favorite traditions!
The adults hide the eggs on Easter Sunday for
the kids to find and once we think we have found them all,
we make Potato Salad and Deviled Eggs - YUMMY!!!

My b/g paper is from CTMH, the egg paper is DCWV.
I had a scrap border that I used which kind of
gave the feel of "grass" I thought.

The sentiment is from Hero Arts.

Thanks for checkin' in!!!

Friday, March 4, 2016

Cut It Up - Happy St. Patrick's Day

Happy Friday!!!

Welcome to another challenge over at Cut It Up!
Cut It Up

Challenge:
St. Patty's Day

Sponsor:
$20 Gift Certificate

My Project:
For my project today, I decided to use
the awesome shamrock cut from Designer's Calendar.
I used the squared feature, they also have a round feature,
but I liked how this one looked for my card.
I cut it at 2 1/2".

My background paper is from The Paper Studio,
the others were just in my stash.

I used some twine from We R Memory Keepers,
and the sentiment is from a Hero Arts set.

I hope you will join us over at Cut It Up!

Thanks for checkin' in!!!


Monday, March 16, 2015

BBTB2 - Luck of the Irish

Happy Monday!!!

Welcome to another challenge over at BBTB2!

Bitten by the Bug 2

The lovely Maureen has challenged us
to get our Irish on!

St. Patrick's Day is tomorrow, so let's celebrate
by using a shamrock on your cards or projects!

I found a sketch from Mojo Monday that I really liked
and thought it would be perfect for a
Monochromatic Card.

I used a bunch of my green and white scraps,
a perfect way to use those up :)

The shamrock comes from Designer's Calendar.
I really do love this cartridge!

The stamp is from CardzTV "Happy Days".
I love this stamp set too :)

Added a bit of bling in the corner and
called it complete!

I hope that you will join us this week over at BBTB2!

Thanks for checkin' in!!!

Monday, October 6, 2014

BBTB2 - Leaves are Falling

Happy Monday!!!

I hope you all had a wonderful weekend,
I know I did!

I was so excited to get my front porch decorated
with hay bails, corn stalks, and pumpkins!!!
Was is Anne of Green Gables who said,
"I'm so glad I live in a world with Octobers"

I second that thought!

So anyway, over at BBTB2, Pam has issued a challenge
to use leaves on our projects, fitting for fall, right?

Bitten by the Bug 2

Here is my project:

I decided to try another shaker card!
I cut out from Designer's Calendar this fun leaf.
The creative feature is "Rounded" so the image is
inside a circle.
I cut it out a bunch of times, twice out of
some pattern paper then a dozen times out of
white cardstock.
I actually cut the leaf out of the white cardstock circles
to give me the space I needed to fill with beads.
I ran all the circles through my Xyron Sticker Machine
and adhered them all together.
I cut out of clear acetate two circles from
George to cover the front and back of the shaker.
I used Scotch Quick Dry Adhesive to glue the acetate
to the cardstock.

All the paper is from My Mind's Eye.
I used some jute twine and added a couple rhinestones
for extra embellishment.

The mat with the shaker is popped up on some foam tape.

Here are some more pics:


I hope you will join us over at BBTB2 for this week's
Falling Leaves challenge!

I am also entering this in to Little Scrap Pieces.

Thanks for checkin' in!

Wednesday, October 1, 2014

Decorate To Celebrate Challenge #85 Anything Goes

Yay for Wednesday!!!
Half way through the week, right?!?!

Today over at Decorate To Celebrate
it is our 2nd "Anything Goes" challenge
but our 85th challenge overall!

For my project, I decided to create
a Halloween Home Decor "BOO" Banner:

I used Cricut Classic Font Cartridge for the letters
and cut them at 11 1/2" out of some chipboard.
I then cut the letters out of some fun Halloween paper
to cover the chipboard.
I just used my ATG gun to adhere them together.
I inked up all the edges with Slate Ink from
Close To My Heart.

I then used TBB&M2 for the bats, Designer's Calendar
for the spider, and Wrap It Up for the pumpkin.
I adhered the bats and spider with glue dots
and the pumpkin is on an Action Wobble.

I ran some purple tulle behind the letters
and tied some fun gold ric-rac ribbon around the ends.


Here is a closer pic...

I hope that you will join us over at Decorate To Celebrate
and remember...
Anything Goes!!!

Thanks for checkin' in!!!


Monday, March 10, 2014

BBTB2 - St. Patrick's Day

The start of a new week is upon us, and with it a new challenge over at 

Bitten by the Bug 2

And it's all about St. Patrick's Day!!!

What a fun holiday! Do you always play along with the "pinching"? It was fun in elementary school, right?  Well, even if I don't go out looking for people who aren't wearing green,
I do like to decorate my house for it.

So I created an EASY PEASY home decor piece!
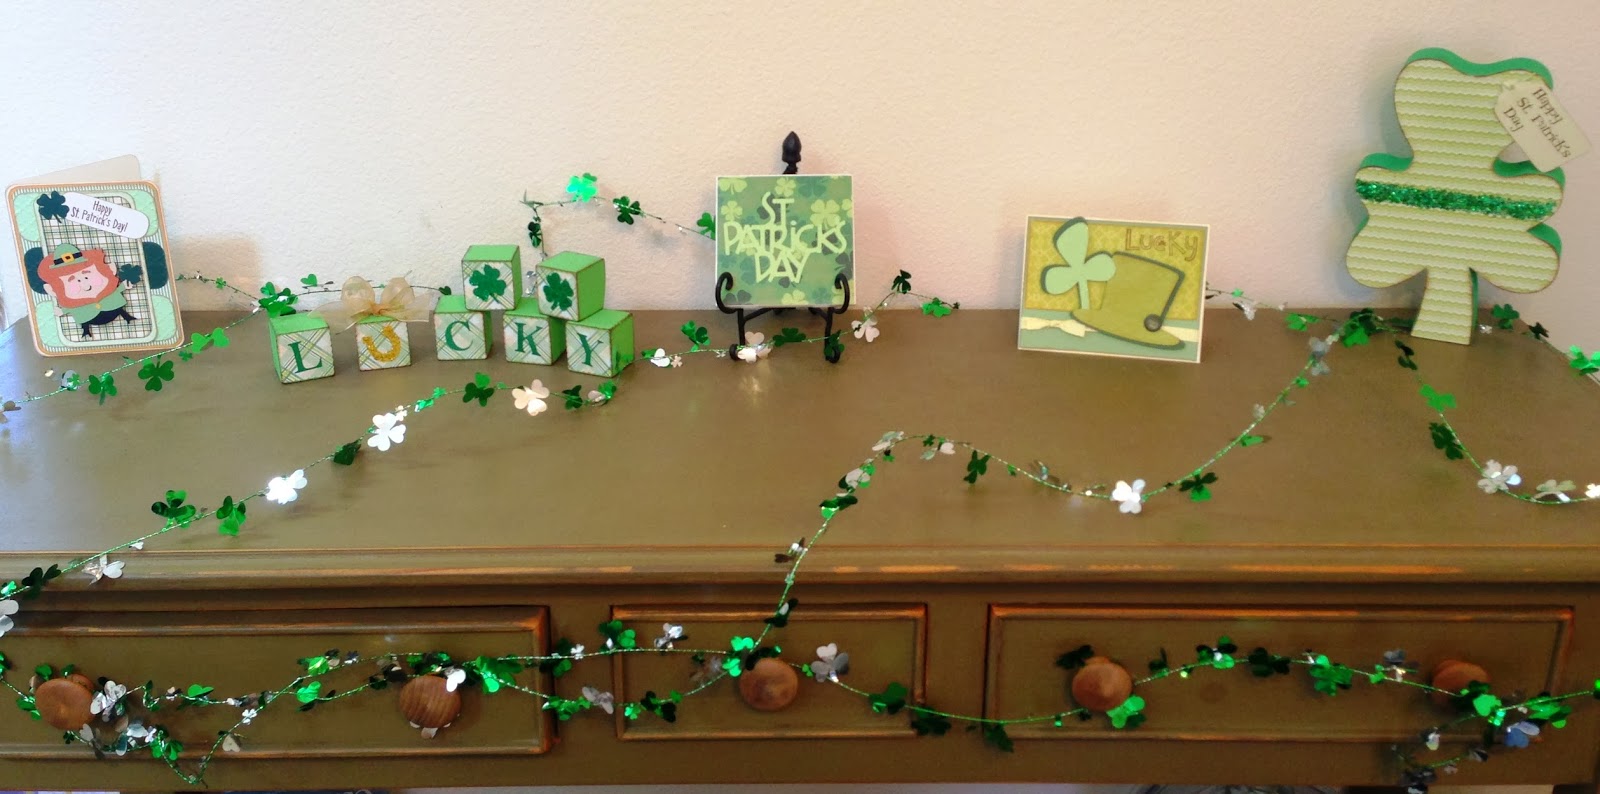
I just buy 4x4 ceramic tiles from Home Depot cut a piece of decorative pattern paper, Mod Podge that right on the tile and then figure out what cut I will add to it.  In this instance, I just cut the phrase "St. Patrick's Day" from Designer's Calendar out of some fun green glitter paper and used Mod Podge to glue that on too.
SO SIMPLE, yet so festive.


Here is a close up of the glitter paper - still kind of hard to see :)


And here is my little table that I decorated with some other crafts and cards


I hope that you will join us this week over at BBTB2 for our fun challenge of St. Patty's Day!

Friday, March 7, 2014

Cut It Up Challenge #40 - GREEN (St. Patrick's Day or Spring)

Cut It Up
Challenge #40
GREEN (St. Patty's or Spring)

Sponsors:
$20 Coupon Code

$25 Gift Certificate

My Project:


Thank Goodness It's Friday, right!!!
Seriously, when is the last time you saw that all written out :)
But, YAY for Friday!!! And not just because it's the weekend, 
but because we are starting another challenge over at Cut It Up!

We want to see all things GREEN!!!
You can do a St. Patty's Day card or a Spring card.
I decided to make a Good Luck card - that's close enough to St. Patrick's Day, right?

I have a video to show you how it all came together so I hope you'll watch!


And be sure to head on over to check out all the Design Team's creations - you won't be disappointed!!!

I am going to be entering this card into the Mojo Monday Sketch Challenge, Pause Dream, Enjoy Challenge, Everyday is an Occasion, CardzTV and More Than Favors Wacky Wednesday Challenge.

Thanks for checkin' in!!!

Wednesday, March 5, 2014

Decorate To Celebrate #70 - St. Patrick's Day


I am so happy it's finally March!!! It just means Spring is right around the corner, 
but before that gets here St. Patty's Day will be upon us along with all things green!  

Today over at Decorate To Celebrate we want to see how you celebrate this lucky holiday.  I needed to add something more to my home decor stash so I created some fun festive blocks.  I had my husband cut some small blocks that measure 1 1/2", then I painted them with some green acrylic paint.  I used Kate's ABC's to cut the pattern paper into scalloped squares and for the letters.  I used Mod Podge to attach the paper to the blocks.  The horseshoe is cut from Create-A-Critter 2 and the shamrocks are from Designer's Calendar.  I glittered up those three cuts for a bit of sparkle and shine.  I inked around all the corners of the blocks with some ColorBox Dark Brown Chalk Ink.  I then sprayed the front of the blocks with some Elmer's spray glue to solidify the glitter and letters.  I had some gold wire ribbon in my stash that I attached with a glue dot.  I am happy with how this turned out! I hope you get your green on and play along with us over at Decorate To Celebrate, and remember you can always submit Birthday projects too!

Thanks for checkin' in!!!  

Friday, November 15, 2013

Cut It Up Challenge #32 - Countdown/Advent

 
CIU #32 Nov 15 - Due November 13, 2013
Challenge starts November 15, 2013 and ends November 27 at noon EST
Challenge: Count down! Advent calendar or
count down to any other event. Must use a die cut
 
Sponsors:
Prize:$10.00 G.C.
Sponsored by: Kadoodle Bug Designs
 
And
 

- Prize: $25.00 gift certificate
- Sponsored by: Pez-A-Doodle Designs
 
My Project:
So I have had this peg board sitting in my garage for I don't know how many years, thinking "I will use that for something someday".  Well, that day has come!!!

I first decided to Mod Podge some red and green papers onto it - SUPER EASY!!!

Put a coat of Mod Podge over the top - and YES!, there were bubbles, but after letting it sit overnight and completely dry, the paper flattened out perfectly for me!

Then it was time to get to work on the boxes!  Did you know that Tags, Bags, Boxes & More has a tree box cut?  Well, I didn't, so you can imagine my excitement when I discovered it! It was going to be PERFECT for my Advent Calendar.  So I cut out these trees at 4 1/2", assembled them and then decorated them up with the pattern paper.  The tree and star cuts are from Designer's Calendar.  I cut them out at 2 1/2" and 3/4", respectively.  The tags/numbers were also from Designer's Calendar and I cut them out at 1 1/2".  The ribbon was the .50 cent type from Michael's (I'm super cheap like that).

Cricut, Tags Bags Boxes and More, Designer's Calendar, Advent Calendar
I bought my wooden pegs at Hobby Lobby, decided not to paint them, although you easily could.  Then spaced the trees out evenly and poked the pegs through the paper.  I hot glued the pegs in the back, and they aren't going anywhere :) 
 
Here is another view of the board...

...and another
 
The boxes open from the side, and you can fit some fun small little treats or prizes for each day of the countdown.  I am super excited to put this to use in a few weeks (really, only a few weeks?) CRAZY!!!  It will be here before we know it, so I better get crackin' on filling these up!
 
I hope that after seeing all the AMAZING projects my DT Sisters have come up with at Cut It Up Challenges, you will be inspired to make a Countdown/Advent of your own AND link it up so we can see it!  This challenge will run for 12 days.  We have some awesome sponsors/gifts up for grabs too!
 
Thanks for checkin' in!!!
 

Monday, October 21, 2013

FCCB Challenge #183 Home Decor

 
What a fun challenge we have going on over at FCCB this week - Home Decor!!!  You can never have too much decor, right? Well, I wanted to put together a door hanging for Fall and this is what I came up with.  I used some chipboard and covered it with some fun leaf paper, cut out my "FALL" from George, and used Designer's Calendar and Create-A-Critter 2 for the leaves, acorns and pumpkins.  I used my Zutter Bind-It-All to bind them together and popped my letters and images up with foam tape.  I have some closer up pics so you can hopefully see the details.  I hope you will join us this week showing your Home Decor projects using your Cricut! I LOVE being inspired by all of your creativity!!!


Monday, October 7, 2013

BBTB2 - "Fall Leaves Are Falling"

 
Cricut, Designer's Calendar, Elegant Edges, Thanksgiving Card

 
Can you guess how I'm feeling? Excited, yes, excited again because I am posting my first DT project for Bitten By The Bug 2!!!  I am now designing for another one of my favorite challenge blogs, and I couldn't be more thrilled!!!  So the challenge this week is "Fall Leaves Are Falling", and they certainly are where I'm at - how about you?  I LOVE fall and I had fun making this Thanksgiving card that captured the essence of the season.  I used Designer's Calendar for THE perfect maple leaf, and I used Elegant Edges for the mat on the front.  I did emboss the mat with The Paper Studio's "Leaves" embossing folder and my patterned paper comes from Doodlebug Designs "Happy Harvest" 6x6 paper pack (LOVE).  I have a video to show you how the card came together, so I hope you'll watch!  And I hope you link up with us over at BBTB2 this week!
 

Monday, September 9, 2013

FCCB Vinyl Education Week - Challenge #177 Vinyl Project

Welcome to Mollie's Motif and the FCCB Vinyl EDU Cricut Crawl - Fantabulous Cricut's version of a Blog Hop!! This week we are challenging you to create a project using vinyl you have cut using your Cricut. We have a fabulous sponsor, Cricket Vinyl Supplies. If we get 100 participants in this challenge, Cricket Vinyl Supplies will give away a Cricut Expression package that includes a Cricut Expression machine, deep cut blade, Jasmine Cricut cartridge, ten 12” x 12” assorted sheets of matte vinyl and one 12” x 12” gridded transfer tape. How exciting is that?? SO SPREAD THE WORD!!!

If you've come from Kim over at ogdendoll.blogspot.com, you're in the right place! If you've just happened across my blog and would like to see all the fabulous Design Team creations head on over to Fantabulous Cricut HERE to start at the beginning. Make sure to check out each DT member's blog! There will be Blog Candy along the way at ALL our DT members' blogs, and there will be a Grand Prize up for grabs at FCCB for one participant who submits a project using vinyl at FCCB!

For my project I decided to put together a subway art type tile to add to my Fall Home Decor.

Cricut, Create-A-Critter, Create-A-Critter 2, Celebrate with Flourish, Designer's Calendar, Paisley, Life's A Party, From My Kitchen, Just Because Cards
 
I used quite a few different cartridges:
"Fall" comes from Create-A-Critter 2; cut at 3"
"Give Thanks" and pumpkin image come from Designer's Calendar; cut at 2 1/2" and 2", respectively
"PIE" comes from Just Because Cards; cut at 8"
"Gobble" comes from Create-A-Critter; cut at 1"
"Good Times" comes from Paisley; cut at 2"
"Preserve" comes from From My Kitchen; cut at 2"
"Family & Friends" comes from Life's A Party; cut at 3 3/4"
Scarecrow image comes from Celebrate with Flourish; cut at 4"
Leaves image comes from Celebrate with Flourish; cut at 3" (with layers)
 
All my vinyl was cut using the following settings:
Deep Cut Blade set at 5"
Speed set at minimum
Pressure set at medium
 
I bought my tile from Home Depot for less than $2 and all my vinyl came from Cricket Vinyl Supplies (LOVE! LOVE! LOVE!).  And if you would like to purchase some vinyl from them, you can get a 15% discount this week by using the coupon code fantabulous!!!
 
I have put together a VIDEO for you too!


AND I have some BLOG CANDY for one lucky FOLLOWER!
Just follow my blog and leave me a comment for your chance to win some FUN Halloween SWAG!
 
 
THANKS so much for stopping by!!!
This project is also going to be entered in at Little Scrap Pieces for their Linky Party.

Your next stop is Amy at thestampingtree.blogspot.com.  Make sure to visit all the stops along the way and when you get done, make sure you link up your project to FCCB's Fantabulous Cricut Crawl post!! And make sure you share with all your blog/crafting friends about the AWESOME giveaway and have them link their projects up too!!

Happy Crawling!!

Here is the line up in case you get lost :