I am attempting to maintain a blog filled with random bits from my life and family as well as my adventures in crafting.

Showing posts with label Classic Scallop. Show all posts

Thursday, August 7, 2014

Craftin' Desert Divas - Bugs & Kisses

Happy Thursday!!!

I hope you all are having a fabulous week so far!

I am so excited for my Daily Post over at Craftin' Desert Divas today!
I LOVE the sentiment "bugs & kisses"
from the newly released Lil Bit Buggie set.


This set is AWESOME!
There are some fabulous, one of a kind sentiments
that Tara has come up with and I LOVE them all!
You can purchase this set HERE.

So here is my card... 

I had so much fun making this card
centered around the sentiment!

My little grasshopper is cut from the Live Simply cartridge.
Although I added some kissy lips :)
The scallop heart border is from Spellbinders Edgeabilities.
I actually combined two different sets of border dies
one from Classic Scallop and the other from Classic Postage Stamp.
I LOVE how versatile these border dies are!

And if you didn't catch it, the lips are from one of the hearts
in the border after I cut it out of some red cardstock.
I used my Cricut Cuttlebug with the Spellbinders.

My pattern paper is from the Heidi Grace Sunshowers
6x6 paper pad - LOVE this paper!!!

I used some rhinestones from Michael's
to add a little bit of bling to the card.

I used some yellow Trendy Twine, too
(sorry I don't know the official name of this color).

My little scallop circle for the sentiment is from Mini Monograms.
Don't you just LOVE the smaller case letters on this stamp?
I do!


Have a wonderful rest of the week!!!

I am also going to link this up over at Pause Dream Enjoy
for the Kids Challenge.

Thanks for checkin' in!!!


Friday, September 6, 2013

Cut It Up Challenge #27 Labor Day


I am so excited to be posting my first project as a DT member at Cut It Up Challenges! The challenge for the next two weeks is Labor Day - Celebrating Pregnancy or New Baby. My card is very simple, but I think it turned out really cute. I used New Arrival for the cute baby girl outfit and the Swiss Dots embossing folder to give it some texture. I rounded my corners of my card and mat and used my Fiskars Sea Pearls corner punch for the patterned paper corners. I also ran my green mat through the Swiss Dots folder. I popped up the patterned paper and outfit with foam tape, as well as my sentiment that came from TPC Studio's Beautiful Baby Girl stamp set. The inside of my card has the same patterned paper as the front with a border created with Spellbinders Edgeabilities Classic Scallop. My ribbon is from American Crafts and the sentiment is from the same TPC set. I think this would be such a cute baby announcement to send to family and friends. Hope you like and I do have a video showing how it all came together. Thanks so much for checking out my card, and be sure to check out the other DT's projects!  This challenge is sponsored by Too Cute by Jessica and a $20 gift certificate is up for grabs, so get your project linked up for your chance to win!!!

 
I will also be entering this into Craftin' Desert Divas Baby Challenge and HIMCR Anything Goes Challenge.


Monday, August 5, 2013

FCCB Challenge #172 - Make A Splash


Oh Boy, Oh Boy...another fun AND challenging challenge for me this week with our FCCB weekly challenge! But I LOVE a good challenge....sometimes, and not 2 weeks in a row :)  We are SOOOO excited to have The Paper Nest sponsoring the challenge this week and for letting us, the design team, use some of their digital stamps.  Their website is so user friendly and downloading and printing the image couldn't have been more easy.  So a HUGE shout out to them!!!  Our challenge this week is "Make A Splash".  What's summer without a few fun water activites at the pool, beach or lake, right?  We want to see all your fun projects realting to water!  This is the first time I have ever used a digital stamp (as you can probably tell!) and Mermaid Ellie is the stamp I chose from The Paper Nest.  I think she is so super cute, well she was before I colored her :) Seriously, I didn't know what I was doing, but I did my best.  I just used whatever colored pencils I had on hand, tried some shading/highlighting/blending and what you see is what I was able to do.  I used Create-A-Critter for the seashell and starfish, and cut them out of some glitter paper.  Used some flatback pearls and fun designer paper to create the ocean scene.  For the side borders on my mats I used Spellbinders Edgeabilities Classic Scallop and ran them through my Cuttlebug using the C plate.  I am so grateful that I had this opportunity to work with a digital stamp, but I don't think I will be going out and buying any Copics anytime soon :)  Hope you will join us this week and be sure to check out the awesome design team's projects!!!  We'd even love to see some of the digital stamps from The Paper Nest on your projects.  Here is a video of how my card came together...

Tuesday, May 21, 2013

How Many Weddings In June?

June is just about upon us and as I think about it, we have 4 weddings to go to!  So I need to get to work on some cards.  Luckily, Mojo Monday has a fantastic sketch this week that I followed for this first card.  I found an awesome 6 x 6 paper pack from DCWV "The Twinkle Glints" stack and it was 50% off at JoAnn's; so $3 later, I had what I needed to make some wedding cards.  It is so shimmery and smooth, I love it.  I also used some paper from Imaginisce "All Occasion" Build-A-Card Pad.  I cut the tag from Elegant Edges and the scallop was cut using Spellbinders Classic Scallop Edgeabilities.  I popped up the sentiment using foam tape.  There are also three Recollections rhinestones, you can't really see them, but they are above the ribbon next to the tag, for a little added bling.  I am also entering this card in My Craft Spot's challenge this week of using ribbon or twine. 

Monday, March 4, 2013

Bye Bye Birdie Challenge #151

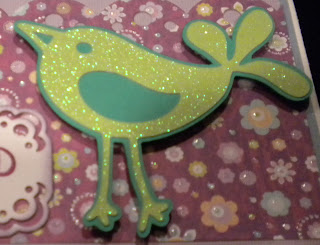
I am so excited to post my very first Design Team project!  FCCB's "Bye Bye Birdie" is such a fun challenge!  I love all the different bird images that the Cricut carts have and the fun sentiments that go along with them from so many stamp sets out there, I wish I could have them all.  Anyway, my little bird is cut from the Home Decor cart and I cut him out with some fun glitter paper.  The patterned paper is from DCWV Pocket Full of Posies stack and it is fun and glittery too.  I used Edgeabilities Classic Scallop for the top border and for the sentiment corners I used Fiskars Corner Punch "Sea Pearls".  The sentiment itself is by Studio 112 that I picked up from Joann's in the $1 bin.  The ribbon I got from Michael's out of a $1 bin too.  Love the $1 bins!  I used Wisteria ColorBox Chalk Ink to ink around the edges of the tag and ColorBox Eggplant Pigment Ink for the sentiment.  This was a fun card to make and now I need to find out some fun juicy gossip so I can send this card out :)

Saturday, February 23, 2013

A Little Sunshine

This little card turned out so nice!  I am excited about finding new sketches and seeing what I can do with them.  There are three challenges that I will be entering this card into.  The first is Whimsical Wednesday "Go Green", the second is Little Scrap Pieces "Emboss It", and the third is Cut It Up "Pinterest Inspired".  I found a card/layout on Pinterest last week that I really liked, I pinned it but hadn't done anything with it.  When I saw Cut It Up's challenge, I went back and found the pin.  It led me to stampdoc.typepad.com and the blogger said she got the sketch from MojoMonday.  Crazy little loop for me, because I decided I am going to start looking through their archives to find fun new sketches to work with.  Anyway, the embossing fit perfectly with Little Scrap Pieces' challenge, and I knew I wanted to use the fun green patterned paper for the Whimsical challenge.  It just all came together so nicely with these challenges complimenting each other in my little craft brain.  The butterfly came from Doodlecharms and I used fun glitter paper for that.  I used Mini Monograms for the Scallop and Circle.  The embossing folders I used were Cuttlebug's Juli's Garden and Bloom Dots.  I cut the scallop border using Spellbinder's Classic Scallop Edgeablilities.  The little "sunshine" stamp is from the Making Memories "Flutter" set.  This was such a fun card to make, I hope you like it!

Tuesday, February 5, 2013

Spring is Here! (Well, not quite)

I sure wish Spring was here!  We are getting so stir crazy staying inside day after day, and this Spring will be a huge milestone for our little family.  My husband will begin the Maintenance phase of his Cancer Protocol and will be able to re-enter society come May.  It has been a long road, and we are so anxious for warmer weather.  Anyway, I was excited to work on something other than Valentine's for a bit, and the Spring challenge from Bitten By the Bug 2 allowed me to do that.  I also used this card for the Paper Playtime challenge of "Border Punches".  I was excited to use the Walk in My Garden cartridge (I got it for Christmas) and this wheelbarrow is a fun cut.  The border was made using the Spellbinders Edgeabilities, which I love so much more than actual border punches.  I mixed and matched the Classic Scallop with the Classic Ric Rac.  This card was very refreshing to make!

My Love Bug

This is a fun card I created for a couple challenges this week.  My Craft Spot issued the challenge "Valentine's for Kids" and Pause Dream Enjoy issued the challenge "Mainly Red".  I used Simply Charmed to cut out the cute bug and phrase "love bug".  The "my" comes from the same cartridge, but I cut it down from the word "yummy" that goes along with the cute pie image on that cart.  I embossed the mat with Swiss Dots, and cut the patterned paper with Spellbinder's Edgeabilities Classic Scallop.  This was a challenge for me cause I don't usually work with red - pink, yes, but not much red.  I am happy with how it turned out and think I might give it to my nephew. 

Monday, January 28, 2013

Love Love Love

 
 Cut It Up's challenge of "Love Is In the Air" and Whimsical Designs challenge of "All About Love" is perfect for getting our minds focused on Valentine's Day. It will be here before we know it! This card was created using George for the heart shape and the embossing folder Doodle Hearts from The Paper Studio (Hobby Lobby). I used Spellbinder's Classic Scallop for the borders on each side of the card. Spellbinder's Edgeabilities comes with three possible borders and I used two of the three styles.  The mat on the inside of the card was also embossed with Doodle Hearts.  I liked out it turned out, just don't know who it will be given to yet :)

Saturday, January 26, 2013

Red, White, and Black Challenge

Okay, so I think this is one of my favorite cards I've ever done :)  CardzTV Stamps issued the challenge to use only red, white, and black, so as I was going through my paper, I came across a paper pack that had a solid red sheet with a cute little skunk in the corner...it totally inspired me and this is what I came up with.  Create-A-Critter, is one of the funnest carts and this skunk is "so stinkin'" cute.  The balloon is from the same cartridge.  I used twine for the balloon string and the scallop is cut from Spellbinders Edgeablities Classic Scallop.  Hope you enjoy it as much as I do!

Tuesday, January 22, 2013

Colors and Flowers

This is my creation for the gofishchallenges.blogspot.com challenge using the pastel colors of blue, yellow, green, and pink and the littlescrappieces.blogspot.com challenge to use a flower.  Again, I used this challenge to come up with another Thank You card I need to send out to family.  The flowers/vase is cut from Kate's ABC's.  I used the Swiss Dots embossing folder for the mat. The craft/pink polka dot paper border was made using the Spellbinder's Edgeabilities dies Classic Scallop and Classic Ric Rac.  I am kind of obsessing over the Edgeabilities right now.  Joann's had them 50% off last week and I have always gone back and forth with buying border punches, but could never commit to them.  These dies are perfect for me!  They take up little storage and you can mix and match them so you have more than just one possible border...genius!  I also chalked around the vase with some ColorBox Cat's Eye Chalk Ink, the Chocolates & Blueberries stack.  Kind of obsessing over the chalk ink too, Michael's had them on 50% off this last week and I bought two stacks.  Super excited to start using all of my fun and new crafting tools this year!