I am attempting to maintain a blog filled with random bits from my life and family as well as my adventures in crafting.

Showing posts with label Wrap It Up. Show all posts

Monday, February 23, 2015

BBTB2 - Clocks


Happy Monday!!!

Hope you all had a fabulous weekend!

Bitten by the Bug 2

Today over at BBTB2
the challenge is all about Clocks!


I decided to use the clock from Wrap It Up.
I basically stuck to the colors in the handbook and just
used papers from my scrap stash.

I used Elegant Edges for the mat.
My b/g papers come from We R Memory Keepers
Anthology 6x6 paper pack.

I used some flat back pearls from Recollections
to add a little balance.

I can't decide what type of card this will be,
but I am thinking either a Father's Day or Retirement Card.

I hope you will join us for this week's challenge
over at BBTB2!

Thanks for checkin' in!!! 

Friday, October 3, 2014

Cut It Up Challenges #55 - Halloween (Anything but a Card)

Happy Friday!!!

I hope your week was awesome and you
are looking forward to a fabulous weekend!

Today over at Cut It Up!
we want to see all your Halloween Projects
but NO cards this time :)

Cut It Up
Challenge #55

Our Sponsor:

Kadoodle Bug Designs
$10 Gift Certificate

My Project:


So who doesn't LOVE witches at Halloween?!?!
I had my nephew CONVINCED I was a witch
in real life for a LONG time when he was younger...
he's almost 16 now and I can't pull that one over on him anymore :)

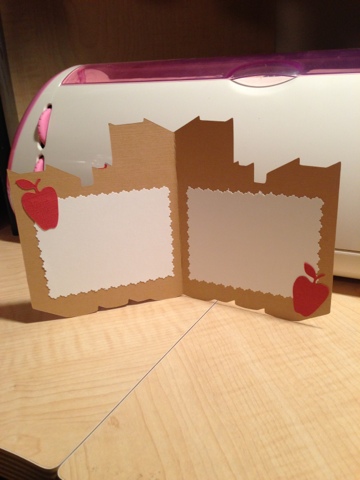
But I found this AWESOME box on the Wrap It Up cartridge
I just HAD to try out!
Seriously, this cartridge has some AMAZING
Halloween images, treat boxes, and tags!
The tag is also from this cart!

So I cut the box at 7 1/2" out of some black cardstock,
then I cut it again out of some fun pattern paper
from The Paper Studio and
adhered the two together.
This made the box extra sturdy!

The witch layer was cut out of some fun green and white polka dot
paper that was in my stash that I thought was very fitting for her!
I then cut a little piece of green cardstock for her face
and glued it on the back of the layer.

I used some Washi Tape for the bottom and added
a couple of Orange Rhinestones from Darice.
 The stamp on the tag is from Joy's Life's
Halloween Pun Stamps.
I used Memento Tuxedo Black Ink for the stamp and
I inked all the edges up with Slate ink from CTMH.

The black and white twine is from We R Memory Keepers
and I just had some purple tulle in my stash
for the topper.

I really like how this turned out and
am planning on giving this to my son's Kindergarten
teacher for Halloween.
NOT because I think she's a witch :)
She's AMAZING!!!

I hope that you will join us over at Cut It Up
for our Anything But a Card
Halloween Challenge!!!

Thanks for checkin' in!!!


Wednesday, October 1, 2014

Decorate To Celebrate Challenge #85 Anything Goes

Yay for Wednesday!!!
Half way through the week, right?!?!

Today over at Decorate To Celebrate
it is our 2nd "Anything Goes" challenge
but our 85th challenge overall!

For my project, I decided to create
a Halloween Home Decor "BOO" Banner:

I used Cricut Classic Font Cartridge for the letters
and cut them at 11 1/2" out of some chipboard.
I then cut the letters out of some fun Halloween paper
to cover the chipboard.
I just used my ATG gun to adhere them together.
I inked up all the edges with Slate Ink from
Close To My Heart.

I then used TBB&M2 for the bats, Designer's Calendar
for the spider, and Wrap It Up for the pumpkin.
I adhered the bats and spider with glue dots
and the pumpkin is on an Action Wobble.

I ran some purple tulle behind the letters
and tied some fun gold ric-rac ribbon around the ends.


Here is a closer pic...

I hope that you will join us over at Decorate To Celebrate
and remember...
Anything Goes!!!

Thanks for checkin' in!!!


Monday, September 29, 2014

FCCB #230 - Shape It Up!!!

Hey All!!!

I hope everyone had a fabulous weekend!!!

Today we have another challenge starting over at FCCB...


Challenge #230 Shape Up
Make a shaped card (any shape but rectangle or square)

This Weeks Sponsor

SVG Attic

$15.00 Giftcard

So here is my card for this week's Challenge:
Shape Up: Make a shaped card


Okay, I REALLY played around with different techniques with this card :)
It turned out kind of crazy I think!

I wanted to make a Halloween card and found this
fun shaped card from the Wrap It Up cartridge.

I just used an 8 1/2" x 11" piece of orange cardstock
and set my machine to "Fit to Page".
It cut out the card at 5 3/4".
Then I decided to just cut the images out at that same size
to layer the front.
I used some fun orange/yellow star paper for the top layer
some darker orange paper for the base,
and some yellow cardstock for the
eyes, nose, and mouth.
But you can't tell that I used yellow paper because
I got my Wink of Stella Glitter Brush Marker in the mail
and decided to play around with that :)
It's a bit sloppy for my first time - oh well!!!
I also INKED up my cuts A LOT,
A LOT more than I normally do!
I added some Trendy Twine to the stem
along with a fun sentiment tag.
The stamp is from Studio G ($1 pack from JoAnn's)

This is definitely a card that I played around with
and it totally looks that way,
but it didn't turn out TOO bad :)

I hope that you will join us for this Shape Challenge
over at FCCB!!!

Thanks for checkin' in!!!


Wednesday, June 11, 2014

Decorate To Celebrate - Father's Day

Happy Wednesday!!!
I love that it's the middle of the week already, don't you?!?!

Well, over at Decorate to Celebrate we have a challenge for you
just in time for Father' Day!
And if you procrastinate anything like I do, 
well, this is perfect timing :)


For my project I used the Wrap It Up Cricut Cartridge
and cut this box out at 7 1/2"
This is technically the back of the box,
but I really like how it turned out!
My paper is from DCWV The Guy Stack.


Here is the "front" of the box, and as you can see it cuts out a tie!
I don't know why but I decided to use this as the back of the box and 
embellish it up a bit with some stamps, enamel dots,
and a fun little clock brad.

This is a more formal looking Father's Day project,
and so I don't know who I am going to give this too :)
Neither my Dad nor my Husband are even close to being this formal!
But I like it!

Anyway, I hope that you will show off your projects
 - not cards or layouts -
that you have created for Father's Day
And remember you can always link up Birthday Projects as well!

Wednesday, May 28, 2014

Decorate To Celebrate - Graduation or Birthday

Happy Wednesday!!!
Hope you are all having an amazing LAST week of May!!!
Can. Not. Believe. It!!!

Well, today over at Decorate To Celebrate we have started
a new challenge all about Graduation!

I am amazed that it's been 20 years since I graduated from HS?!?!
CRAZY!!!

Anyway, we want to see your
decorations, invitations, gifts,
basically ANYTHING BUT a Card or Layout
for all those graduates in your life!

I decided to decorate a gift box with all things
Graduation.

****WARNING****
****LOTS OF PICS*** 


I have tried to capture all sides of the box
so you could see all the stamps, embellishments, etc.

The hourglass brad is from Hobby Lobby.


The box comes from Wrap It Up, I cut it at 9".


All the stamps come from a Graduation Set by TPC Studio.
I used Memento Tuxedo Black Ink.
I also inked around the edges with some ColorBox Chalk Ink.

This is the top of the box.

I used enamel dots from Recollections for the each of the caps.
As well as some small flat back pearls from Michael's
to add some embellishment.


This is the back of the box with the lid slightly open.

I cut small strips of self-adhesive glitter ribbon from American Crafts
and added them around the box.

I cut some acetate and adhered it on the inside
of the box behind the caps.

Now it's ready to be filled with goodies or a gift!

I hope that you will join us for this challenge,
and remember
you can always link up your birthday decorations too!

Thanks for checkin' in!!!


Monday, May 26, 2014

Craftin' Desert Divas Fun Fold Grad Card

Fun Folds Linky Party

Sponsors:

Miriams Crafting Supplies: $5 Credit (not on ATG or Shipping)

Close To My Heart
Lucy Kelleher "Close to My Heart": $10 G.C. (Only in U.S.)

My Project:
For this super fun linky party, I created a Tri-Shutter Card.
If you have never made one of these, you have to try it out!
There are some awesome tutorials on YouTube
on how to do these cards :)

FCCB and BBTB2 have new challenges stating today too.
Over at FCCB (see below for sponsor info) we want to see
Graduation projects
and BBTB2 we want you to use
a "car" cut on your projects.

I combined all of them into this fun Graduation card.
I used Wrap It Up for the diploma
and Beep Beep for the convertible car.
The "GRAD" and "2014" are both cut from Plantin Schoolbook.
My papers were all in my scrap stash, 
this style of card is perfect to use up scraps :)

All my stamps are from Craftin' Desert Divas.
The "Congrats" and "Wish Big" come from Simply Said
and the "Away we go" comes from Destination Fun.
I did some alteration to that stamp by crossing out "we" 
and adding "you" above it with a black gel pen.
I thought it was fitting for this card :)

The enamel dots are from Michael's

This is how it looks folded up :)

I hope you will join us for these fun challenges starting today!

Here is the sponsor info for FCCB:
 

Challenge #212 Class of 2014

This Weeks Sponsor
Docerela Creations
~This Weeks Challenge~
Class of 2014
Create a graduation project

To qualify for the prize, be sure to use at least 1 Cricut cut on your project and if it's not obvious, let us know what cartridge you used.

I am also linking this up over at Little Scrap Pieces.

Thanks for checkin' in!!!
I hope you have a wonderful Memorial Day!!!

Wednesday, October 16, 2013

Pumpkin Treat Box

Cricut, Wrap It Up, Halloween Treat Box
 
Here is a fun little treat box I made using the Wrap It Up Cartridge.  I cut this box out of some black cardstock at 8".  The pumpkin doesn't have the stem under the box feature, so I cut it out of some green cardstock at 2 1/4" under the shift-layer feature to make it work.  I decorated the box with some fun pattern paper from a $1 Scrapbooking Halloween pack.  I had some fun ribbon in my stash, don't know where it's from, and I added some black buttons.  Super easy!  I am going to be entering this project into a few challenges: My Craft Spot "3D Halloween", Paper Playtime "Ribbons and Buttons", CardzTV "Pumpkin Patch", and Decorate To Celebrate "Halloween Party".  Thanks for checking in!!!


Friday, September 20, 2013

Cut It Up Challenge #28 - Going In Circles


Cricut, Wrap It Up, Mini Monograms, Itty Bitty Stamps, Unity Stamp Co,


Happy Friday!!! It's another start to another AWESOME challenge over at Cut It Up Challenges! We want you to start "Going In Circles" with your projects.  Load your projects up with circles and use a die cut (it can be from any machine/tool).  We have some AMAZING sponsors for this challenge too! One lucky winner will win 5 Itty Bitty stamps from Unity Stamp Company AND a $20 coupon code to As Cute As A Button!  So make sure you get your projects linked up, there is plenty of time!!!


For my project, I used the Button Bingo Itty Bitty stamp that Unity Stamp Company so graciously sent me to build a "fun and games" birthday card for a pre-teen boy.  My pattern paper all came from DoodleBug's Day to Day 6x6 paper pad that I purchased from The Royal Castle Shoppe on FB.  I used George to cut out all my circles, Mini Monograms for my letters, and Wrap It Up for my game controller and "jacks".  I also used Swiss Dots, Modern Wallpaper, and Chevron embossing folders to add some dimension to a few of my cuts.  Be sure to watch my video to get all the crafty details of my card...it was super fun to put together!!!


Wednesday, September 11, 2013

Back to School to Shape It Up...


Cricut, Wrap It Up, Shape Cards, Back to School


So here is another fun shape card from Wrap It Up, and yes, it is another back to school project! But this time I wanted to make a project for someone a little more mature and not in elementary school per se. So this card could be given to a high schooler or even someone going to college. I really like the muted colors of this card and the books shape is just fun. I cut this card at 5 1/2 inches and instead of using the layer cut for the card, I cut the layers out for the actual image, not the card function key. I used the same size and it cut the perfect size to match. Hopefully that makes sense. I used Plantin Schoolbook for the letters of the subjects and the little apples on the inside. I just cut some white card stock for the mats inside and used my new pair of Paper Studio Wavy Edge "Cloud" scissors from Hobby Lobby that I picked up for a buck! I'm going to be entering this card into BBTB2's challenge of shaped cards and Exploring Cricut's challenge of back to school. Thanks for stopping by and taking a look at my project!

Wednesday, August 28, 2013

Happy Kindergarten!

Cricut, Wrap It Up, Schoolhouse Box, Plantin Schoolbook

Cricut, Wrap It Up, Schoolhouse Box, Plantin Schoolbook
I am so excited to be linking up to a challenge over at Decorate to Celebrate! It's been WAY too long since I have.  The challenge is to create Back To School and Classroom Favors for a party or celebration.  Well, my little guy is seeing all of his friends start kindergarten and because he has a late birthday won't start until next year, but he does start preschool next week, so that's GREAT!  He wanted to make some cookies today and bring them to his friend and say "Happy Kindergarten" to him.  I thought it was a perfect opportunity to have a craft day with him too.  He picked out what he wanted to make, I just put it together.  So even though this isn't for a party, per se, it is a Back To School favor.  The schoolhouse box comes from the Wrap It Up Cartridge, the ABC/123 comes from Plantin Schoolbook, along with the apple tag.  I used patterned paper from DCWV Grade School pack.  It turned out really cute, and my son was super proud and excited to give it to his friend, he even wrote his name on the back of the tag - and that made me super proud!

Monday, July 29, 2013

FCCB Challenge #171 - Shape Card

 
OH MY GOODNESS! This card drove me CRAZY!!! What a challenge it was for me, but I am so glad that I stuck with it and finished it. Don't get me wrong, I am super excited that FCCB has this challenge to create a shape card, I had never done one before, so I am happy that I finally did, but WOW! What a learning experience it was for me. I used Wrap It Up for the fun school house card, Designer's Calendar for the "Back 2 School" phrase, and Simply Charmed for the paper and pencil. The pattern paper all comes from the DCWV Grade School pack. I did some free hand cutting on the inside mats and tried faux stitching for the first time ever. My video goes into more detail of how this all came together. Honestly, I am not in love with this card, but it works. When I showed it to my husband he said, "What happened?" Mainly because this card is so far from my regular style. But that's okay, it is always good to step outside of your comfort zone, figure things out, experiment and learn - trial and error, right? My 4 year old son is excited to give this to his preschool teacher next month and that's what matters. I hope you will join us this week over at FCCB for our Shape Card challenge, I am excited to see your projects and anxious to learn more of the secrets behind the shape card feature!!!  I will also be entering this card in CardzTV challenge they have going on this week.
 
Wrap It Up, Designer's Calendar, Simply Charmed, Cricut

Wrap It Up, Designer's Calendar, Simply Charmed, Cricut

Monday, May 13, 2013

Congratulations Graduate! FCCB Challenge #160


And yet another school year is coming to an end, with it a slew of happy graduates!  We are honoring all the grads this week over at FCCB, so hopefully you will play along with us.  This card I made for my sister-in-law who graduated from UVU with her bachelor's.  She still has 5 kids at home and made it through!  I am so proud of her and happy that she is done with school.  For this card I used Birthday Bash for the base (stamp) card.  The grad cap is from Wrap It Up and I used dimensionals to pop it up.  The paper is from TPC Studio Valedictorian Hat Toss.  On the inside I used the reverse side of the paper and tied some baker's twine around it.  I have already given this card to her, because she graduated a couple of weeks ago, but I do have to say that she loved it :)